Feeling the itch to wander around, me and my backpacking partner “Miele”, decided to go on a trip on that coming weekend. So I sat in front of the computer and did my research. I stumbled upon this beach resort “Munting Buhangin Beach Camp”. This resort was featured in Jessica Soho as one of the potential future Boracays. I discovered that their rates were affordable and they have a lot of activities you can do other than swim. Trying to avoid too much expense we decided to just have a day trip.
How to Get There:
So that Sunday we hopped on a bus going to Nasugbu. Never been there, we decided to just get off at the last stop of the trip (Nasugbu Bayan).
There’s a lot of bus lines going directly to the Bayan of Nasugbu. Just to name a few, Golden Dragon, Erjohn and Almark, Mindanao Lines, BSC, etc. Most if not all of these buses go through the Cavite-Batangas route. Most of them have terminals in Pasay and Lawton. Fare rates are approximately 150php and up. Coming from the terminal, it may take up to 2-3 hours, but can take more if there’s heavy traffic.
Setting off at 5:30 am, we arrived at nasugbu bayan around 8am, we got off at the front Jollibee and had our breakfast there.
Nasugbu Bayan’s side street is lined with fast food chains. If you’re planning to just buy food along the way, you can buy your food and water here so that you won’t have to buy at the resort. Not sure if there’s a wet&dry market nearby.
After breakfast, we bought bottled waters then asked around on how to get to Wawa. Jollibee’s security guard said that other than driving a private vehicle, taking a tricycle ride is the only way to get to Wawa. So we negotiated with one of the tricycle drivers to drop us there and pick us up later on.
There are actually tricycle drivers waiting for tourists going to Wawa. It usually costs 200-250 pesos a ride (so that’s at least 400 pesos back and forth). Make sure you get the driver’s contact number so that you can inform him if you need to be picked up already. When you’re planning to go home already, text the driver at least an hour before you actually check out. This will give him time to gas up and drive back to the resort.

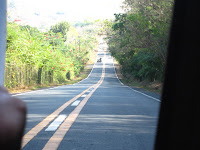


 The tricycle ride takes about 15-20 minutes, mainly because it constantly goes uphill and downhill. You will pass by some other private resorts like White Cove, Kawayan Resort, Punta Fuego and Canyon Cove. Upon arriving at the gate of Munting Buhangin, I said “Yehey! We’re here! That was fast!” but I was so wrong. At the gate, you will be asked to register your vehicle and the guard will give you like an entrance ticket (but looks like a receipt), and yes you have to do this even if you’re riding a tricycle. Then your vehicle would have to descend for about 5 more minutes through a steep hill which is slightly paved. If you have a private vehicle, you can just drive to the parking area and park there. Not sure if there’s a parking fee. If not, the driver will drop you off at the top of a long staircase. Pay the driver and inform him around what time you would like to be fetched, remind him that you will contact him. Then climb down the staircase and you fill find the admitting office just at the bottom.
  Make your transactions there and ask about some details about the activities you want to do. You don’t have to pay for everything at once; you can pay all the expenses when you check out. Entrance fee for Day Trip is 180/head and for Overnight, 200/head.
 We asked for a medium sized tent (for 900) since there’s only two of us and renting a gazebo would be just a waste. One of the staff there set up the tent on the location that we wanted.
Munting Buhangin is about 24 hectares and shares a crescent cove with Terrazas de Punta Fuego. The good thing about this cove is that no other beach resort can suddenly squeeze itself between the two. So the privacy and serenity of the beach will not be further exploited.
Activities you can do:


 When we settled ourselves in our tent, we then started swimming. The shore is shallow, perfect for just having fun while swimming. Since I’m not really a seawater-beach-kinda-girl, after 30 minutes of goofing around in the water, we decided to go kayaking for 300 pesos per hour (2 seater). We also rented snorkelling gear for 150 each (which can be used for the whole day).
 We paddled until we reached the right most part of the cove where the water’s too high already, there’s no beach to walk on, and the rocks are too big. Here you can already jump into the water and look at the coral reefs, but you have to be careful though because in most parts it’s too shallow and the reefs are too high, you could hit them and get injured (like me). If you’re snorkelling from the shore and deeper into the water, you don’t really have to get too far to see different kinds and colors of fishes. I even saw a solitary blow fish, which made me freak out because it was swimming towards me even though I was walking away from it.
If kayaking and snorkelling at the same time wasn’t that hard we would have gone for more than an hour...but unfortunately it was. The current is too hard to oppose, so you can’t really snorkel leisurely. Getting off the kayak is hard but not harder than getting back on. if you don’t want to lose your kayak, one of you must be on it while the other is snorkeling.

 Since we didn’t bring our own food (coz’ we didn’t want to), we had to eat at the only restaurant there. We ordered Inihaw na pusit and Halabos na Hipon, 1 garlic rice and 2 extra rice, and 1L bottled water for P700+ already. You have to pay for it outright because they won’t put it on your tab. We thought, we should have brought ulam then we could’ve just bought rice from the resto. Should’ve walked my talk huh?
After lunch, we stayed inside the tent, I slept and Miele hanged out, he just wanted to hide from the noontime sun. When it wasn’t that hot anymore, we continued swimming and snorkelling until it was a bit dark.
We actually wanted to ride the jetski, but since it was 3,500pesos, i just shoved the idea at the back of my mind.
We also wanted to go hiking because they also have a hiking trail going to the top of the stone face of the cove. People can actually set camp there and spend the night. But the lifeguard advised us that it could be dangerous because there are a lot of stray dogs in the forest. So we decided to do it after swimming, but we realized that it was going to be dark soon, so we just settled for “next time”.
People can also play table tennis, volleyball, billiards, darts and sing with a videoke if they get bored from swimming. Though we opted not to. we didn’t really want to spend for something that we can do back home.


So before we showered, we took advantage of the great scenery of the setting sun on the infinite water and took as many pictures as we could. We even got to help some local fishermen dock their fishing boats on the shore.Before showering, i texted the tricycle driver to come pick us up already.
The shower room is separate from the toilet, which is good because less people get crowded in lines. There are 10 cubicles available (don’t know for the boys’). Shower water flows just right, though there are no hooks or areas where you can put your things. So it’s kind of a hassle. But then again you’re just showering off the salt and sand from your body and hair, do you really have to be high maintenance?
After showering, manong informed me that he was already there on top of the staircase. We climbed up the stairs while glancing from time to time at the beautiful sunset scene. We rode the tricycle up the steep hill and gave the gate pass to the on duty gate-guard.
Don’t forget or even try to avoid paying for your stay. You need to pay at the counter so you can get your gate pass. They can also just approach you to get your payment and give you the pass and your change.
 The ride back was kind of shorter (i think). We asked the driver to drop us off the church. Since it was a Sunday there was a holy Mass being held. We didn’t really want to go inside we just wanted to pray and make a wish since it was our first time there. We were worried people will get disturbed and distracted from our backpacks.. hehe.. so we just stayed outside and marvelled at the beauty of the church from there.
We then had dinner at Mang Inasal, we were starving and the way back home would take hours. Just next to Mang Inasal is the bus terminal going to Pasay/Lawton. Board the bus, sit back, relax and sleep. Just tell the conductor to wake you up upon arriving to your destination.
 Hope you got some useful information from this entry and had fun from my story. One secret I can share with you on how to have the best trip every single time is this: Don’t expect too much. Don’t go looking for experiences that you can’t find or afford during the trip. Don’t complain with what is offered to you, instead try to make the best out of what you can avail. If the facilities suck, don’t stress over it, don’t add it to the things you want to remember during the trip. Instead focus on the fun parts of your trip and remember the good things about travelling.
for more information on Munting Buhangin Beach Camp, pls visit their website: http://www.muntingbuhangin.ph/
| Add caption |

